Many home gardeners struggle to know precisely when to harvest celery, often leaving stalks to become tough or bolting before optimal flavor. This guide will walk you through the precise timing and techniques for harvesting your celery, alongside the essential steps for blanching it, ensuring tender, flavorful stalks for your culinary creations.
Understanding Celery Maturity: When to Harvest for Best Results
Knowing when your celery is ready for harvest is crucial for enjoying its crisp texture and vibrant taste. Premature harvesting can result in underdeveloped, less flavorful stalks, while waiting too long can lead to stringy, bitter celery. The key lies in observing both the plant’s overall growth and the condition of individual stalks.
Visual Cues and Optimal Maturity for Cutting Celery Stalks
Celery typically matures in 90 to 120 days from planting seeds, or 60 to 90 days from transplanting seedlings. The ideal time for harvesting arrives when the stalks are firm, thick, and approximately 8 to 12 inches tall from the base to the first leaf joint. The overall plant should appear robust and healthy, with a good cluster of stalks. You will notice the inner stalks are lighter green, indicating tenderness, while outer stalks are a darker green. For optimal flavor and tenderness, avoid harvesting celery that has started to produce a seed stalk, a process known as bolting. Bolting often occurs in response to warm temperatures or inconsistent watering, and it causes the stalks to become tough and bitter.
Another strong indicator of readiness is the firmness of the central stalks. Gently squeeze the entire bunch near the base; it should feel solid and dense. If the bunch feels loose or hollow,
the celery may need more time to mature. The leaves should be a rich green, not yellowed or wilting, which can signal stress or disease. Observing the color and texture of the lower stalks is also helpful. They should be uniformly green or slightly blanched (if you’ve undertaken a blanching process in the garden) and free from significant blemishes or signs of pest damage.
Techniques for Cutting Celery Stalks: Individual or Whole Plant Harvest
There are two primary methods for harvesting celery: taking individual outer stalks or harvesting the entire plant. Your choice depends on your immediate needs and whether you want to encourage continuous production or clear the bed for other crops.
- Harvesting Individual Stalks: For a continuous supply, many gardeners prefer to harvest individual outer stalks. To do this, use a sharp, clean knife or garden shears to cut the stalks at the base, about one inch above the soil line. Select the largest, outermost stalks, leaving the inner, younger stalks to continue growing. This method allows the plant to keep producing for several weeks, often until the first hard frost. When cutting, make a clean incision to minimize damage to the plant and reduce the risk of disease.
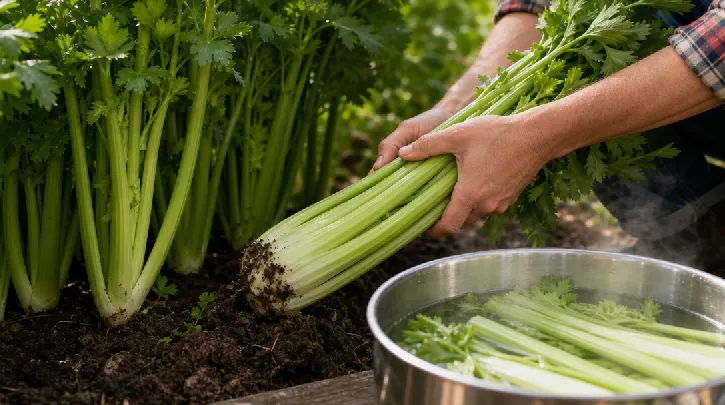
- Harvesting the Whole Plant: If you need a large quantity of celery at once, or if the growing season is ending, you can harvest the entire plant. To do this, use a sharp knife or spade to cut the main stem just below the soil line, or gently dig up the entire root ball. Carefully brush off any excess soil. Harvesting the whole plant is typically done when most of the stalks have reached an optimal size and firmness. This method is often favored when preparing a large batch for canning or freezing, as it ensures a uniform harvest.
Encouraging Celery Regrowth After Harvest
For gardeners who choose to harvest individual stalks, encouraging celery regrowth after harvest is a rewarding process. The plant’s crown, if left intact with its root system, has the potential to produce new stalks. After cutting the outer stalks, ensure the remaining plant receives adequate water and nutrients. A light application of balanced liquid fertilizer can help stimulate new growth.
Alternatively, if you’ve harvested the entire plant by cutting just above the root crown, you can attempt to regrow celery from the base. Place the bottom two inches of the celery stalk in a shallow bowl of water, ensuring the cut side faces up and the base is submerged. Change the water daily. Within a few days, you should see small roots emerging from the bottom and new shoots beginning to sprout from the center. Once roots are about an inch long and new leaves appear, you can transplant the celery base into soil, leaving the very top of the crown exposed. This method often yields smaller, but still usable, stalks and is an excellent way to extend your harvest from kitchen scraps.
Common Celery Harvesting Mistakes to Avoid
Even experienced gardeners can make mistakes when harvesting celery. One common error is harvesting too early, resulting in small, underdeveloped stalks lacking the characteristic crispness. Conversely, waiting too long, especially after the plant shows signs of bolting, leads to tough, bitter, and fibrous celery that is unpleasant to eat. Another mistake is using dull tools, which can tear the stalks and open the plant to diseases, hindering its ability to regrow. Always use a sharp knife or clean garden shears for precise cuts. Finally, neglecting the plant’s post-harvest care, such as proper watering and occasional fertilization, can severely limit the potential for new growth from a partial harvest. Maintaining consistent moisture in the soil after harvesting individual stalks is vital for continued production.
Mastering the Art of Blanching Celery for Tenderness
Blanching is a critical step for many gardeners who wish to preserve celery, particularly for freezing. This process helps retain the celery’s vibrant color, crisp texture, and nutritional value, while also halting enzyme activity that causes spoilage and loss of flavor during storage. Understanding the “how-to” of blanching ensures your preserved celery is as delicious as fresh.
Why Blanch Celery? Preserving Flavor and Texture
The primary reason to blanch celery for tenderness and preservation is to inactivate enzymes. These naturally occurring enzymes are responsible for the degradation of flavor, color, and nutrients in vegetables after harvest. If you freeze raw celery without blanching, it will likely develop an unpleasant dull color, a mushy texture, and a diminished flavor over time. Blanching stops these enzymatic reactions, ensuring that your celery retains its desirable qualities when thawed and used in cooking. It also helps to clean the celery, removing any surface dirt or microorganisms, and brightens its natural green color, making it more appealing. For extended storage, especially freezing, blanching is non-negotiable for quality.
Step-by-Step Guide: How to Blanch Celery
Blanching celery is a straightforward process, but precision is key for optimal results. Follow these steps for successful blanching:
- Preparation: Start by thoroughly washing your celery stalks under cold running water. Remove any leaves, tough outer stalks, or damaged sections. You can blanch whole stalks or cut them into desired lengths, typically 1/2-inch to 1-inch pieces, depending on how you plan to use them. Cutting them uniformly ensures even blanching.
- Boiling Water Bath: Bring a large pot of water to a rolling boil. For every pound of celery, you’ll need at least one gallon of water to ensure the temperature doesn’t drop too significantly when the celery is added. Add about 1 teaspoon of salt per gallon of water, which can help maintain the celery’s color and slightly enhance its flavor.
- Blanching Time: Carefully immerse the celery into the boiling water. Use a blanching basket or a large metal strainer to lower the celery into the pot. Start timing immediately. Celery stalks or pieces generally require 3 minutes of blanching. Do not overcrowd the pot; blanch in small batches if necessary to maintain water temperature. The water should return to a boil within one minute of adding the celery.
- Ice Water Shock: As soon as the blanching time is complete, immediately transfer the celery from the boiling water into a large bowl of ice water. This rapid cooling, known as “shocking,” stops the cooking process instantly and helps preserve the crispness and color. Ensure the ice water bath is sufficient to cool the celery quickly and thoroughly. Stir the celery in the ice bath for the same amount of time it was blanched, typically 3 minutes.
- Draining and Drying: Once thoroughly chilled, remove the celery from the ice water. Drain it completely in a colander, then spread the blanched celery in a single layer on clean kitchen towels or paper towels to air dry. Removing as much surface moisture as possible is essential for preventing ice crystals and freezer burn if you intend to freeze it. Patting it dry with additional towels can speed up this process.
Alternative Blanching Methods
While boiling water blanching is the most common and generally recommended method for celery, alternative techniques like steaming can also be used. Each method has its own set of advantages and considerations.
- Steaming Blanching: For steaming, place the prepared celery in a steamer basket over boiling water, ensuring the water does not touch the celery. Cover tightly and steam for 5 minutes. Steaming can sometimes result in slightly less nutrient loss compared to boiling, as the celery isn’t directly submerged in water. However, it often takes a bit longer to achieve the same enzymatic inactivation, and some find the texture to be slightly less crisp than water-blanched celery. The same principle of immediate ice water shocking applies after steaming.
- Microwave Blanching (Not Recommended for Celery): While some vegetables can be blanched in a microwave, it is generally not recommended for celery. Microwave blanching can lead to uneven cooking and inconsistent enzyme inactivation, which defeats the purpose of blanching for preservation. The lack of uniform heat distribution makes it difficult to ensure food safety and quality for longer-term storage.
For large batches and reliable preservation, boiling water blanching remains the gold standard for celery due to its efficiency and effectiveness in stopping enzymatic activity. For more detailed food preservation guidelines, the National Center for Home Food Preservation provides comprehensive resources. National Center for Home Food Preservation
Storing Blanched Celery for Longer Shelf Life
Once blanched and thoroughly dried, celery is ready for storage. Freezing is the most common method for blanched celery, allowing it to be stored for extended periods while maintaining quality.
-
Freezing Blanched Celery:
- Pre-freeze (Optional, but Recommended): For individual pieces that don’t clump together, spread the thoroughly dried blanched celery in a single layer on a baking sheet. Freeze for 1-2 hours, or until solid.
- Packaging: Transfer the pre-frozen or just dried blanched celery into freezer bags or airtight freezer-safe containers. Remove as much air as possible from freezer bags using a vacuum sealer or by pressing out air before sealing.
- Labeling: Label each package with the contents and the date of freezing.
- Storage Duration: Blanched celery stored properly in a freezer at 0°F (-18°C) or colder will maintain excellent quality for 8 to 12 months. After this time, it is still safe to eat but may experience a decline in quality.
- Refrigerating Blanched Celery: Blanched celery can also be stored in the refrigerator, but for a much shorter duration. Place cooled, blanched celery in an airtight container in the coldest part of your refrigerator. It will typically remain fresh for 3-5 days. This method is useful if you’ve blanched a larger quantity than you need for an immediate recipe but plan to use the rest within a few days.
Troubleshooting Blanching Issues
Even with careful execution, issues can arise during blanching. The most common problem is celery becoming mushy. This usually happens due to over-blanching, where the celery is left in the boiling water for too long. Stick strictly to the 3-minute blanching time. Another common issue is dull or faded color, which can result from insufficient blanching time (not fully inactivating enzymes) or not shocking the celery immediately and thoroughly in ice water. If the celery tastes bitter after blanching, it might have been overcooked, or the raw celery itself was past its prime or had bolted. Always start with fresh, high-quality celery to achieve the best blanched product. Ensure your ice bath is truly cold; using an insufficient amount of ice or too much warm celery can raise the water temperature too quickly, hindering the shock process.
Beyond the Basics: Expert Tips for Celery Success
Achieving a bountiful and flavorful celery harvest, followed by proper preservation, involves more than just timing your cuts and dips. A holistic approach to cultivation and a few advanced insights can elevate your celery game.
Choosing the Right Celery Varieties
The variety of celery you choose can significantly impact your success and the final quality of your harvest. Some varieties are more forgiving for home gardeners, while others are prized for specific culinary attributes. For example, ‘Utah 52-70 R Improved’ is a widely popular commercial and home garden variety known for its vigorous growth, crisp stalks, and good disease resistance. Another excellent choice is ‘Tall Utah’, which also produces robust, flavorful stalks. For those seeking slightly shorter, more compact plants, ‘Conquistador’ offers good yields and a rich flavor. Self-blanching varieties, such as ‘Pink Plume’ or ‘Golden Self-Blanching’, require less effort in the garden to achieve tender, pale stalks, as they naturally whiten without needing to mound soil around them. When selecting seeds, consider your local climate and growing season length, as some varieties perform better in cooler conditions while others tolerate moderate heat. Always source seeds from reputable suppliers to ensure viability and true-to-type plants.
Soil and Water Needs for Robust Growth
Celery is a heavy feeder and requires consistently moist, nutrient-rich soil to thrive. It performs best in fertile, well-draining loam with a pH between 6.0 and 7.0. Before planting, amend your soil generously with compost or well-rotted manure to improve its structure and nutrient content. A soil test can provide precise recommendations for any necessary amendments. Celery’s shallow root system makes it particularly sensitive to water fluctuations; inconsistent watering can lead to stringy stalks, bitterness, and bolting. Aim for at least 1-1.5 inches of water per week, either from rainfall or irrigation, especially during dry spells. Mulching around the plants with straw or aged wood chips helps retain soil moisture, suppress weeds, and keep the soil temperature consistent, which celery prefers. Avoid overhead watering late in the day, as this can encourage fungal diseases. Drip irrigation or soaker hoses are excellent choices for delivering water directly to the root zone.
Integrated Pest Management for Celery
Celery can be susceptible to several pests and diseases, but an integrated pest management (IPM) approach can minimize issues without relying heavily on chemical interventions. Common celery pests include aphids, leaf miners, and slugs. Aphids can be managed by spraying with a strong stream of water or applying insecticidal soap. For leaf miners, floating row covers can prevent adult flies from laying eggs on the foliage. Slugs are often controlled with hand-picking in the early morning or evening, or by setting beer traps. The U.S. Environmental Protection Agency’s site on IPM offers further detailed information. Diseases like early blight and late blight can affect celery. Good air circulation, proper plant spacing, and watering at the base of the plant can help prevent fungal issues. Removing and destroying affected plant parts can slow the spread of disease. Crop rotation, avoiding planting celery or related crops in the same spot year after year, also helps break pest and disease cycles. Regularly inspecting your plants allows for early detection and intervention, which is key to successful IPM.
Celery: From Garden to Gourmet Kitchen
Once you have successfully harvested and blanched your celery, a world of culinary possibilities opens up. Freshly harvested celery, with its crisp texture and mild, slightly peppery flavor, is a staple in many kitchens. It’s often used raw in salads, as a crunchy snack with dips, or as an essential component of a crudité platter. The tender inner stalks and leaves are particularly prized for these uses.
Blanched celery, especially when frozen, becomes a convenient ingredient for cooked dishes. It’s perfect for soups, stews, casseroles, and stir-fries, where its texture holds up well after thawing. For example, the French mirepoix (celery, carrots, and onions) and the Cajun holy trinity (celery, bell peppers, and onions) both rely heavily on celery as an aromatic base. Having blanched celery on hand means you can quickly assemble these foundational flavor bases without the need for fresh prep. Many chefs and home cooks also use blanched celery in stuffings, sauces, and as a cooked side dish. Its mild flavor pairs well with a variety of other vegetables and proteins, making it a versatile addition to almost any savory meal. Even the celery leaves, which are often discarded, are edible and possess a more concentrated celery flavor, making them excellent for garnishing, adding to stocks, or incorporating into pesto.
Frequently Asked Questions About Celery Harvesting and Blanching
Here are some common questions home gardeners and cooks have about handling celery.
How can I tell if my celery has bolted and what should I do?
Celery has bolted when it sends up a tall, thick flower stalk from the center of the plant. The leaves may become smaller and the stalks will often become tough and bitter. If your celery has bolted, it is generally best to harvest any remaining usable outer stalks immediately, as the quality will continue to decline. The plant’s energy shifts to seed production, so the stalks lose their desirable flavor and texture. You can still use the leaves for flavoring stocks or soups if they aren’t too bitter, but the main stalks are usually not worth eating.
Is it possible to blanch celery in a microwave?
While some vegetables can be quickly steamed in a microwave, it is generally not recommended for blanching celery. Microwaves can heat unevenly, leading to inconsistent enzyme inactivation. For reliable preservation, especially for freezing, the traditional boiling water blanching method is far more effective at stopping the enzymatic processes that cause quality degradation over time. Uneven blanching can result in a poorer texture, color, and flavor in your stored celery.
How long can I store freshly harvested, unblanched celery in the refrigerator?
Freshly harvested, unblanched celery can be stored in the refrigerator for about 2 to 4 weeks if properly prepared. To maximize its shelf life, wash and dry the stalks thoroughly, then wrap them tightly in aluminum foil or place them in an airtight container. Avoid storing celery in plastic bags, as the trapped ethylene gas can cause it to spoil faster. Placing the celery in a crisper drawer also helps maintain humidity and freshness.
What are the benefits of self-blanching celery varieties?
Self-blanching celery varieties are cultivated to produce naturally paler, more tender stalks without the gardener needing to “blanch” them by mounding soil around the stems. This saves time and effort during the growing season. These varieties tend to have a milder flavor and less bitterness compared to some green varieties, making them excellent for eating raw or in salads. They are a great choice for gardeners looking for a less labor-intensive celery crop.
Can I use celery leaves in cooking, and how should I store them?
Yes, celery leaves are edible and flavorful. They have a more concentrated celery taste than the stalks. You can use them fresh in salads, as a garnish, or chop them finely and add them to soups, stews, and stocks for an extra layer of flavor. To store fresh celery leaves, wrap them in a damp paper towel and place them in a sealed plastic bag or container in the refrigerator, where they will last for about a week. You can also dry them for longer storage to use as a seasoning.
Successfully harvesting and blanching celery allows you to enjoy its crisp texture and fresh flavor year-round. By understanding the plant’s growth cycles, applying careful cutting techniques, and meticulously following blanching procedures, you ensure a high-quality product for both immediate consumption and long-term storage. These practices not only maximize your garden’s output but also elevate your culinary endeavors with homegrown excellence.