Growing robust, flavorful celery can feel like a delicate balancing act, often frustrating gardeners who find their stalks thin or bitter. Understanding the precise **celery soil requirements** and optimal light exposure is the key to unlocking abundant, crisp harvests right from your garden. This comprehensive guide will equip you with expert insights to cultivate thriving celery, ensuring every stalk is a success story.
Understanding Celery’s Core Environmental Demands
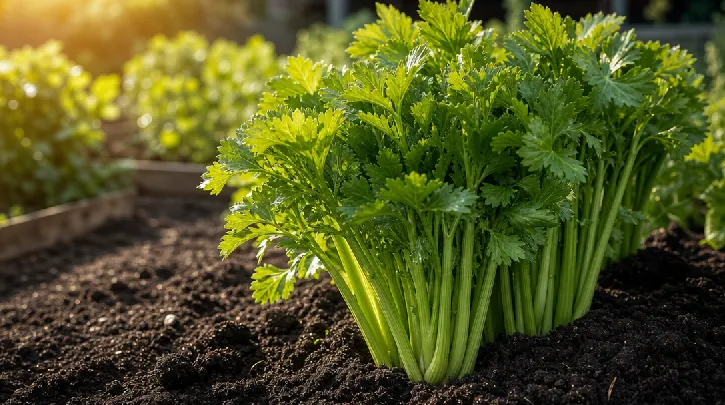
Celery (Apium graveolens var. dulce) is a cool-season biennial typically grown as an annual in most home gardens across the United States. Its crisp texture and distinctive flavor depend heavily on consistent environmental conditions from germination through harvest. Unlike many root vegetables or fruits, celery’s edible part, the stalk, is essentially a leaf petiole, requiring specific care to develop properly. Providing the right foundation from the start makes all the difference for a successful crop.
Why Soil Matters: More Than Just a Growing Medium
The soil where you plant your celery is far more than just something to hold the plant in place; it is a complex ecosystem. It supplies essential nutrients, regulates moisture, and provides crucial aeration for root development. The physical structure of the soil directly impacts how well celery roots can spread, absorb water, and take up vital minerals. Poor soil conditions inevitably lead to stunted growth, tougher stalks, and increased susceptibility to pests and diseases. Therefore, achieving the best soil for celery is a foundational step in cultivation.
Deciphering Celery Light Needs: Sun Exposure Explained
Light is the primary energy source for photosynthesis, the process by which plants convert sunlight into food. For celery, the amount and intensity of light it receives directly influence stalk development, flavor, and overall plant vigor. Understanding the nuances between what constitutes full sun for celery and when partial shade celery is preferable can significantly impact your harvest quality. Environmental conditions, particularly temperature, also interact with light requirements, making location-specific adaptations important.
Crafting the Perfect Soil Foundation for Celery Success
Celery is a heavy feeder that demands consistently moist, nutrient-rich soil to produce its characteristic crunchy stalks. Neglecting soil preparation is one of the most common mistakes new celery growers make. A thoughtfully prepared planting bed sets the stage for healthy, rapid growth and helps mitigate many potential problems before they arise.
The Gold Standard: Loamy, Organic-Rich Soil
The ideal soil for celery is a deep, fertile, well-draining loam that is rich in organic matter. Loamy soil typically consists of a balanced mix of sand, silt, and clay particles, which provides an excellent balance of water retention and drainage. This structure allows water to permeate evenly while preventing waterlogging, which can suffocate roots and promote disease. Organic matter, such as well-rotted compost or aged manure, significantly enhances these qualities. It improves soil structure, increases water-holding capacity, and provides a slow-release source of nutrients. For instance, soil amended with ample organic material can hold moisture like a sponge, releasing it slowly to the celery roots as needed.
The Critical Role of Soil pH for Celery
Soil pH is a measure of its acidity or alkalinity, and it profoundly influences nutrient availability to plants. Celery thrives in a slightly acidic to neutral soil environment, with an optimal soil pH for celery ranging from 6.0 to 7.0. Within this range, essential macronutrients like nitrogen, phosphorus, and potassium, as well as crucial micronutrients, are most readily available for uptake by celery roots. If your soil pH falls outside this range, nutrient deficiencies can occur even if the nutrients are present in the soil. For example, a pH too low (acidic) can lock up phosphorus, leading to poor root development. Conversely, a pH too high (alkaline) might make iron unavailable, causing yellowing leaves.
Testing your soil’s pH is straightforward using a home test kit or by sending a sample to your local university extension office. For instance, many state extension programs, like those offered by universities such as Cornell University, provide detailed soil analysis reports, including pH and nutrient recommendations. Cornell Cooperative Extension offers valuable resources on soil testing for home gardeners. If your soil is too acidic (below 6.0), you can raise the pH by incorporating agricultural lime. If it is too alkaline (above 7.0), you can lower the pH by adding elemental sulfur or sphagnum peat moss. Always apply amendments gradually and retest to avoid over-correcting.
Enhancing Soil Structure with Compost for Celery
Incorporating generous amounts of compost for celery is arguably the single most impactful step you can take to create the ideal growing environment. Compost is decomposed organic material that acts as a natural soil conditioner and fertilizer. It improves soil aeration, enhances drainage in heavy clay soils, and increases water retention in sandy soils. Beyond its physical benefits, compost introduces beneficial microorganisms that improve nutrient cycling and suppress plant diseases. I typically recommend amending beds with a 2-4 inch layer of well-rotted compost worked into the top 6-12 inches of soil before planting. This provides a rich, loose medium that celery roots can easily penetrate.
Beyond compost, other organic amendments can further improve soil quality. Well-aged animal manure (from cows, horses, or chickens) is another excellent source of nutrients and organic matter, but ensure it is fully decomposed to avoid burning plants with excess nitrogen. Coconut coir is a sustainable alternative to peat moss, improving water retention and aeration, especially in container gardening or raised beds. Green manures, or cover crops, like clover or vetch, can also be grown and then tilled into the soil to add organic matter and nutrients naturally, a practice that builds long-term soil health.
Avoiding Common Soil Pitfalls
Several soil conditions can severely hinder celery growth. Compacted soil is a major problem, as it restricts root growth, limits air and water penetration, and makes it difficult for celery to absorb nutrients. Heavy clay soils are prone to compaction and waterlogging, leading to root rot. If you have heavy clay, consider growing celery in raised beds filled with an engineered soil mix, or consistently amend with large quantities of compost and gypsum to improve its structure over time. Sandy soils, on the other hand, drain too quickly and struggle to retain nutrients, requiring frequent watering and heavy amendment with organic matter to improve their water-holding capacity. Before planting, consider a soil test to understand your specific conditions and plan amendments accordingly.
Illuminating Your Celery Patch: Optimizing Light Conditions
Celery is a cool-season crop, but its light requirements are not always straightforward. The ideal light exposure often depends on your specific climate and the intensity of the sun. Balancing sufficient light for vigorous growth with protection from excessive heat is a crucial aspect of successful celery cultivation.
The Verdict on Full Sun for Celery: When It’s Best
In cooler climates with moderate summer temperatures, full sun for celery is generally ideal. “Full sun” typically means at least six hours of direct sunlight per day. Under these conditions, celery plants can photosynthesize efficiently, leading to strong, thick stalks and a robust flavor profile. Adequate light also helps prevent diseases by ensuring leaves dry quickly after watering or rain. In regions with average summer temperatures below 75°F (24°C), planting celery in a location that receives full, unobstructed sun will yield the best results. The increased light energy translates to more sugars produced by the plant, contributing to a sweeter, less bitter taste.
Navigating Partial Shade Celery: A Strategic Approach
For gardeners in warmer climates, particularly those with scorching summer afternoons, a strategic approach to partial shade celery is often beneficial. Partial shade means the plants receive between three and six hours of direct sunlight daily, typically in the morning, followed by protection from the intense midday or afternoon sun. Temperatures consistently above 80°F (27°C) can cause celery to bolt (flower prematurely) or develop a bitter taste and pithy texture. In these conditions, providing afternoon shade can prevent heat stress, keep the soil cooler, and extend the harvest period. For example, planting celery on the east side of a taller crop like corn, or using a temporary shade cloth during the hottest parts of the day, can significantly improve results. This allows the plants to benefit from morning light while avoiding the most damaging heat and UV radiation.
Adapting Light Exposure to Your Climate
The best light strategy for celery is highly dependent on your local climate. In USDA Hardiness Zones where summers are mild, providing a spot that receives full sun from morning until late afternoon is usually optimal. For those in hotter zones, such as the southern United United States, carefully chosen partial shade celery locations are essential. I have found that providing morning sun and afternoon shade works very well in areas like the Mid-Atlantic. This could mean planting in an area that gets morning sun from 8 AM to 1 PM, then is shaded by a fence or larger plant for the rest of the day.
Gardeners can use various tools to modify light exposure. Shade cloths, available in different densities (e.g., 30-50% shade), can be draped over hoops to provide temporary relief during heatwaves. For cooler regions, where every bit of light helps, consider using reflective mulches around plants. These mulches can bounce light back up to the undersides of the leaves, increasing the overall light capture, especially in cloudy conditions. The key is to
observe your plants and adapt your strategy; wilting in the afternoon sun is a clear sign that more shade is needed.
Watering and Nutrients: Supporting Your Celery’s Growth Journey
Celery is approximately 95% water, which means consistent moisture and a steady supply of nutrients are absolutely vital for developing those crisp, succulent stalks. Any inconsistency can lead to tough, stringy, or bitter celery.
Consistent Moisture for Crisp Stalks
Celery has a shallow root system and a high demand for water, especially during hot, dry periods. It needs consistent, even moisture to prevent its stalks from becoming tough, stringy, or hollow. Irregular watering can also trigger bolting, where the plant prematurely sends up a flower stalk, ending its productivity. Aim for at least 1 to 1.5 inches of water per week, either from rainfall or irrigation. In sandy soils or during prolonged dry spells, this might mean daily watering. The best way to ensure consistent moisture is through drip irrigation or soaker hoses. These methods deliver water directly to the root zone, minimizing evaporation and keeping foliage dry, which helps prevent fungal diseases. Overhead watering, while acceptable in cooler conditions, can lead to uneven moisture distribution and encourage leaf spot diseases in humid environments. Applying a 2-4 inch layer of organic mulch, such as straw, shredded leaves, or wood chips, around the base of your celery plants is also extremely beneficial. Mulch helps suppress weeds, moderate soil temperature, and, most importantly, conserve soil moisture, reducing the frequency of watering.
Feeding Your Celery: Essential Nutrients
As a heavy feeder, celery requires a steady supply of nutrients throughout its growing season. It particularly benefits from nitrogen, which promotes lush, green foliage and strong stalk development. Phosphorus supports root growth, and potassium is crucial for overall plant health and disease resistance. A balanced fertilizer program, starting with rich, compost-amended soil, is key. Before planting, I recommend incorporating a slow-release organic fertilizer into the soil. Throughout the growing season, a regular feeding schedule with liquid organic fertilizers, like fish emulsion or compost tea, can provide a boost. Apply these every 2-3 weeks, especially after the plants have established and begun active growth.
Be mindful of potential mineral deficiencies. A common issue with celery is a calcium deficiency, which can manifest as “blackheart,” where the inner stalks turn black and rot. This is often not due to a lack of calcium in the soil, but rather inconsistent watering or rapid growth caused by excessive nitrogen, which hinders calcium uptake. Maintaining even soil moisture and avoiding extreme fluctuations in growth rate can prevent blackheart. Another less common but possible deficiency is boron, which can lead to cracked stems and brown spots. While less common in well-composted soils, if you suspect a deficiency, a specific mineral supplement might be needed after a soil test confirms the issue. The University of California’s Division of Agriculture and Natural Resources provides comprehensive information on vegetable planting and nutrient management, which can be useful for identifying and correcting specific nutrient issues in vegetables like celery.
Practical Strategies for Exceptional Celery Production
Successful celery cultivation involves more than just good soil and light; it requires a systematic approach to preparation, variety selection, and ongoing care. By implementing these practical strategies, you can significantly increase your chances of a bountiful and high-quality harvest.
Soil Preparation: A Step-by-Step Guide
Proper soil preparation is the cornerstone of growing healthy celery. This isn’t just about throwing some dirt in a pot; it’s about building a living, nutrient-rich environment.
- Test Your Soil: Begin by collecting a soil sample and sending it to a reputable lab, such as your local university extension office. This provides precise information on your soil’s pH, nutrient levels, and organic matter content.
- Calculate Amendments: Based on your soil test results, determine the necessary amendments. If your pH is off, plan to add agricultural lime (to raise pH) or elemental sulfur/peat moss (to lower pH). For nutrient deficiencies, calculate the required organic fertilizers.
- Incorporate Organic Matter: Spread a 2 to 4-inch layer of well-rotted compost or aged manure over your planting area. This is critical for improving soil structure, water retention, and nutrient availability.
- Loosen the Soil: Using a broadfork or garden fork, gently loosen the soil to a depth of at least 12-18 inches. Avoid deep tilling with a rototiller, which can destroy soil structure and beneficial microbes. The goal is to create a friable, well-aerated bed.
- Mix Amendments Thoroughly: Work the compost, pH adjusters, and any other granular organic fertilizers evenly into the loosened soil. Rake the bed smooth, creating a level surface for planting.
This thorough preparation ensures that the celery soil requirements are met from the very first day your seedlings are transplanted.
Choosing the Right Varieties for Your Conditions
Selecting the appropriate celery variety is important, particularly if you face specific climate challenges. Celery varieties are often categorized by whether they need blanching (protection from light to achieve whiter, less bitter stalks) or are self-blanching.
- Self-Blanching Varieties: These types, such as ‘Tango’ or ‘Conquistador’, have a natural tendency to produce paler, more tender stalks without requiring extensive effort to block light. They are a good choice for home gardeners seeking simpler cultivation.
- Green Varieties (Trenching): Traditional green varieties, like ‘Tall Utah’ or ‘Pascale’, often benefit from blanching techniques to improve tenderness and flavor. This involves mounding soil, straw, or newspaper around the lower stalks as they grow, shielding them from light. While more labor-intensive, these varieties can produce exceptionally flavorful results.
- Heat-Tolerant Varieties: If you live in a region with hotter summers, look for varieties specifically bred for heat tolerance, such as ‘Utah 52-70R Improved’. These are less likely to bolt prematurely or turn bitter under stress.
Consider your growing season length and average temperatures when making your selection. Local nurseries can often provide advice on varieties that perform well in your specific microclimate.
Troubleshooting Common Celery Growth Issues
Even with careful planning, issues can arise. Understanding their causes, often linked to celery soil requirements or celery light needs, can help you course-correct.
- Bolting (Premature Flowering): This is when a celery plant sends up a flower stalk instead of focusing energy on stalk development. Common causes include sudden temperature fluctuations (especially cold snaps followed by heat), prolonged cold temperatures, or inconsistent watering. Providing shade during heatwaves and maintaining consistent moisture can help prevent bolting.
- Pithy or Stringy Stalks: This often indicates inconsistent watering, insufficient nutrients, or very rapid growth followed by stress. Ensure constant moisture and a steady supply of balanced nutrients.
- Yellowing Leaves (Chlorosis): General yellowing can point to a nitrogen deficiency, which is common in hungry crops like celery. A liquid feed of fish emulsion can quickly correct this. If new leaves are yellow with green veins, it might indicate an iron deficiency, which is often related to high soil pH making iron unavailable.
- Bitter Taste: Insufficient water, too much direct sun in hot climates, or nutrient deficiencies can lead to bitter stalks. Ensure adequate water, consider partial shade, and confirm proper soil fertility.
- Blackheart: As mentioned, this is typically a localized calcium deficiency, often caused by inconsistent water delivery to the growing point of the plant. Maintaining even soil moisture is the primary solution.
Regular observation of your celery plants is your best defense. Catching problems early allows for timely intervention, often saving your crop.
Expert Insights for Home Gardeners
Cultivating celery successfully often comes down to a few key principles honed over seasons of growing. It’s about understanding the plant’s fundamental needs and then adapting those to the unique conditions of your garden.
What I’d Actually Do: My Approach to Celery Beds
When I’m setting up a bed for celery, my primary focus is always on creating a truly rich, moisture-retentive soil environment, because good celery soil requirements are non-negotiable for success. I start by ensuring my bed is in a spot that gets at least 6 hours of morning sun, ideally with some afternoon shade during the peak summer months here in the Northeast. I’d never plant celery directly into unamended garden soil. Instead, I heavily incorporate 4 to 6 inches of high-quality compost into the top foot of the bed, along with a granular organic vegetable fertilizer. This front-loads the soil with nutrients and dramatically improves its structure.
I also prioritize consistent watering. I don’t rely on rainfall; I set up a drip irrigation system with emitters near each plant. This ensures deep, even watering without wetting the foliage, which helps prevent fungal issues. For me, mulch is also non-negotiable. A thick layer of straw or shredded leaves around the plants keeps the soil cool, suppresses weeds, and crucially, maintains consistent soil moisture. I also tend to plant my celery starts a little deeper than some other vegetables, burying the small root ball and just the very bottom of the stems, to encourage stronger anchorage. Finally, I’m a firm believer in blanching the stalks for tenderness; a simple cardboard collar or mounding soil up around the lower stems a few weeks before harvest makes a noticeable difference in quality.
Long-Term Soil Health for Continuous Harvests
Beyond a single growing season, focusing on long-term soil health will ensure your garden remains productive for celery and other crops. Crop rotation is a crucial practice. Avoid planting celery in the same spot year after year; instead, rotate it with plants from different families, such as legumes or root vegetables. This helps break pest and disease cycles and prevents the depletion of specific nutrients.
Incorporating cover crops during off-seasons is another excellent strategy. Planting a cover crop like crimson clover or oats in the fall and tilling it into the soil in the spring adds organic matter, prevents erosion, and improves soil structure naturally. Regular additions of compost, even in small amounts annually, will continue to build a thriving soil ecosystem. By nurturing your soil, you are investing in the sustained vitality and productivity of your entire garden.
Frequently Asked Questions About Celery Cultivation
What is the ideal soil pH for celery?
The ideal soil pH for celery ranges from 6.0 to 7.0, which is slightly acidic to neutral. Maintaining this pH level ensures that all essential nutrients are readily available for the plant to absorb, promoting healthy growth and preventing deficiencies.
Can celery grow in full sun in all climates?
No, while celery generally prefers full sun (6+ hours of direct sunlight), this recommendation is best suited for cooler climates with moderate summer temperatures. In regions with very hot summers (consistently above 80°F or 27°C), celery benefits from partial shade, especially during the intense midday and afternoon hours, to prevent bolting, bitterness, and sunscald.
How much compost should I add to my celery bed?
For optimal best soil for celery conditions, aim to incorporate a substantial amount of compost. Spread a 2 to 4-inch layer of well-rotted compost or aged manure over the planting area and thoroughly work it into the top 6-12 inches of soil before planting. This provides rich organic matter and a slow-release nutrient supply.
Why are my celery stalks thin?
Thin celery stalks are often a sign of insufficient nutrients, inconsistent watering, or inadequate light. Celery is a heavy feeder and needs steady moisture and rich soil to develop thick, crisp stalks. Ensure your soil is well-amended with compost, provide regular feeding with a balanced organic fertilizer, and maintain consistent soil moisture, especially during active growth periods.
What are the signs of insufficient light for celery?
Signs of insufficient light for celery include pale, elongated, or spindly stalks, often reaching weakly towards a light source. The leaves might appear lighter green or yellowish, and overall growth will be slow and stunted. Inadequate light also often contributes to a weaker flavor and a less crisp texture in the harvested stalks.
Successfully growing celery that yields crisp, flavorful stalks boils down to understanding and consistently meeting its fundamental needs for specific celery soil requirements and balanced light exposure. By meticulously preparing a rich, well-draining soil with a balanced pH, ensuring consistent moisture, and strategically managing sunlight based on your climate, you can cultivate a thriving celery crop that transforms your gardening efforts into abundant, delicious harvests.